![]() How to Repair a Disk on Mac OS X from Command Line
How to Repair a Disk on Mac OS X from Command Line
Mac OS X comes with an easy-to-use application, called Disk Utility, that allows users to verify and repair hard disks using a graphical user interface and it is recommended for most Mac users that are not comfortable using the terminal. However, this can also be performed using the command-line. This could come in handy in situations when you can't or don't want to use Disk Utility for some reason.
In this guide, I will show you how you can repair a disk on Mac OS X using the command-line.
View Connected Devices
The first thing you need to do is start Terminal (/Go/Utilities/Terminal). Once you have done that, you need to check the names of the volumes that are currently connected to your system. You can do that using two simple commands:
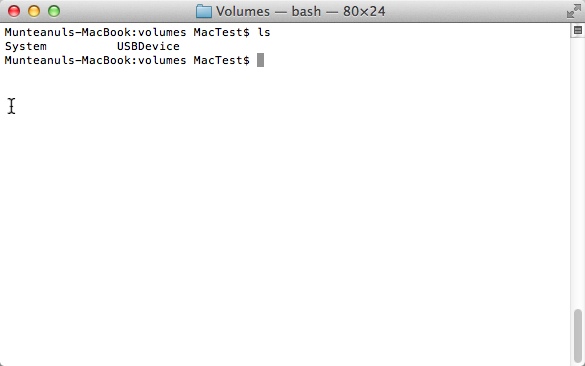
cd /Volumes - this will change the active folder under terminal to your hidden Volumes directory
 Switched to Volumes Directory
ls - this will list names of all the connected drives
Now, you terminal should look like this:
 LS command
Disk Verification
Now, it is time to verify your volume and determine if it needs to be repaired or not. In order to do that, you need to type the following command (make sure you replace [drive name] with the actual name of your volume)::
diskutil verifyVolume [drive name]
For example, if you want to test your Mac's hard disk, you just need to type:
diskutil verifyVolume /
Or, if you want to test, say, an external storage device that you named "Movies" and you are not in the Volumes folder in terminal your command should look like this:
diskutil verifyVolume /Volumes/Movies/
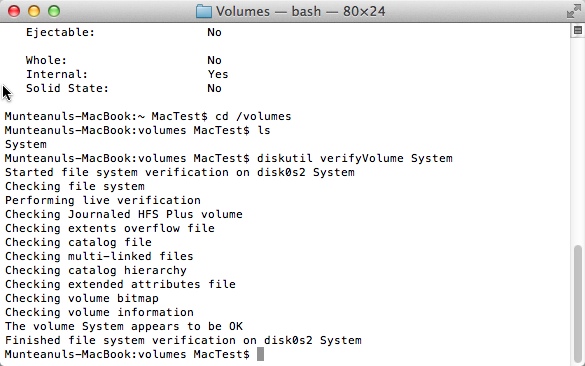
After some time (depending on the size of the tested volume), a message will be displayed that will tell you of the current state of your drive (see image)
 After Disk Verification
As you can see, after I've tested my Mac's hard drive (named System), the message was "The volume System appears to be OK". If, instead of this message, the test returns a message like "The volume System was found corrupt and needs to be repaired", then it is time to start fixing the problem.
Disk Repair
After you determine the volume you need to repair, all you have to do is simply write this command (make sure you replace [drive name] with the actual name of your volume):
diskutil repairvolume /Volumes/[drive name]
Furthermore, if you want to repair your Mac's hard drive, then you can type
diskutil repairvolume /
Conclusion
As the message from the terminal window says, you have successfully repaired your drive using the command-line version of Disk Utility. Even if it is commonly considered hard to use by some Mac users, the command-line is a very helpful feature and, if you have followed the guide, you should have your volumes fully repaired.
If you receive an error when trying to repair your drive using the command-line, then you might want to restart your Mac in recovery mode (using the Command-R key combination) and retype to repair command or simply use Disk Utility (might be easier for you using the GUI version).
If you keep having problems with your drive, then you should try the fsck approach (a more advanced command-line repair mode) or your drive might be physically damaged, in the latter case you should start creating backups of your data and get a new drive.


I see these comments "creating backups of your data" frequently from apple and others when a repair disk has failed. The comment and advice is inherently questionable, as damaged disks that won't mount - difficult to recover data...