 How to share files on Windows 10
Unlike its predecessors, the latest version of the Windows OS, Windows 10 manages to make file sharing really easy, simple, convenient, straightforward, and effective. There are multiple ways of sharing files and folders on both the local network and the Internet.
Share files on your local network using the Windows' File Explorer
A pretty important advantage of choosing this method is the fact that the files and folders that are shared this way can be accessed from any device on your local network, regardless of its type or operating system. Furthermore, password protection is enabled by default, so the users who want to access the shared data will have to log on with the same Windows username and password as used on the sharing PC. Plus, by editing the permissions, you can allow only specific users to access the files over the Internet. Though it's not recommended if you want to disable password-protected sharing and allow anyone with permissions to access the shared content without being prompted for the password, then go to Control Panel > Network and Sharing Center > Change advanced sharing settings > All Networks > Password-protected sharing and press the button for Turn off password-protected sharing, before clicking to Save changes.
As for the actual sharing of files and folders on the network using the File Explorer, here's how to do it:
1. Navigate to the item you wish to share (it must be a folder).
2. Right-click that folder and select Properties from the context menu.
3. On the Properties window, click the Sharing tab. Then, click on the Advanced Sharing... button.
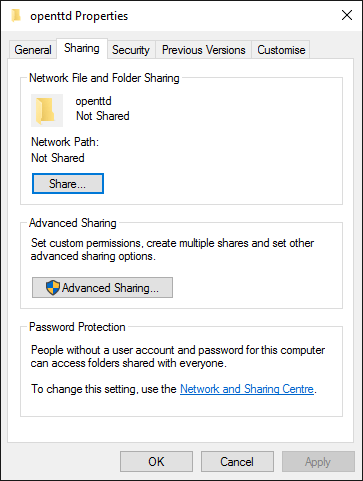 Folder Properties - The Sharing Tab
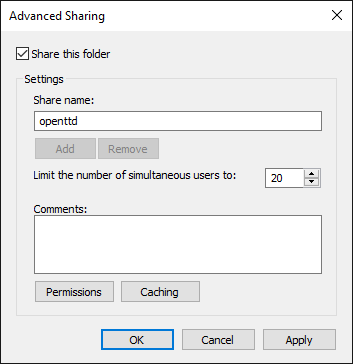
4. Check the box to Share this folder. If you click OK now, then the folder is shared with all the users from your local network, while they all have read-only access, which means they can only open it. The files from that folder cannot be edited or deleted by the users.
 Sharing Folder
In order to change this setting, from the "Advanced Sharing..." window, you have to click the Permissions button. This will allow you to edit permissions: from the Group or User names section, you can add or remove specific users, and from "Permissions" you can choose the permissions for each allowed user: "Read" (read-only), "Change" (editing allowed), and "Full control".
 Permissions
Share files on your local network using Windows HomeGroups
This method has its limitations and downsides, mainly because it doesn't allow you to share files with computers running older versions of Windows than Windows 7 or with devices running a different operating system.
1. First, access the HomeGroup feature, either by going to the Control Panel and selecting the Large Icons view or simply by typing "HomeGroup" in the search field next to the Start button and selecting the corresponding entry.
2. You can join any existing HomeGroup on your network by clicking on its name and entering the correct password. If no HomeGroup is available, you can create one by yourself. Just press the "Create a Homegroup" and follow the steps of the wizard interface until you get to press the "Finish" button.
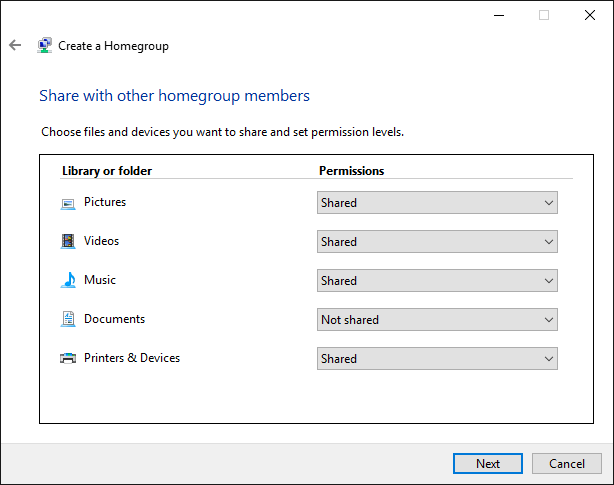 Window from the HomeGroup Creation Wizard
3. Now, that you're part of a HomeGroup, you can share files within that HomeGroup by right-clicking the folder containing them, and then, in the context menu that opens, moving your mouse over the Share with line and selecting the name of the HomeGroup where you want to share the files contained by that folder. You can now choose between the 'view' option that will allow people to open your files and the 'view and edit' option that also allows them to edit or delete them.
Sharing files on the Internet using Windows 10's Share feature
Windows 10 allows users to quickly share files with the whole world using the newly-added "Share" tab of the Windows' File Explorer. In the top left corner of pretty much every File Explorer window, you’ll see the Share option, which offers further additional options to help you distribute your files on the Web: Share, Email, and Zip.
 Windows 10's Share Tab
After you select one or multiple files, pressing the Share button will bring up a prompt on the right side of the screen asking you which method of sharing the files and which app you would like to use. This list may contain apps and methods like Facebook, Twitter, OneNote, and others. Of course, you'll have to be logged into the respective accounts for those services. If you have an e-mail client assigned as default for handling your e-mails on Windows 10, you can also use the Email option of the Share tab from File Explorer to quickly share files via e-mail.
 The Share Panel with Corresponding Options
Conclusion
As you can see, Windows 10 truly makes file sharing easier than ever before. Furthermore, sharing directly on the Internet is possible in a simple and comfortable manner.
Alternative downloads
-
 Acronis Access Connect
$795
windows
Got Mac users in the office? Because they have different communication protocols...
Download
Acronis Access Connect
$795
windows
Got Mac users in the office? Because they have different communication protocols...
Download
-
Norton Online Backup
$49.99
windows
Norton™ Online Backup automatically safeguards your files...
Download
-
SugarSync Manager
free
windows
Easily backup, access, synchronize and share your files and folders across your computers and mobile devices.
Download


Comments