 How to classify your iTunes music library depending on BPM characteristic
The BPM, short for beats per minute is a value that measures the tempo of a song, which, basically, indicates the speed of a given piece and, depending on the genre of your music files, the BMP values might vary. For example, the average BMP levels for hip-hop music is somewhere between 80 and 115 BMP, while in techno music, the levels range between 120 and 160 BMP.
In case you didn't know, iTunes gives you the possibility to organize your songs by their BPM values on both your Mac and Windows systems, simply by creating smart lists. The following guide will show exactly how to do that and will provide you with some additional steps you might need to perform in order to achieve this goal.
View or add BPM values
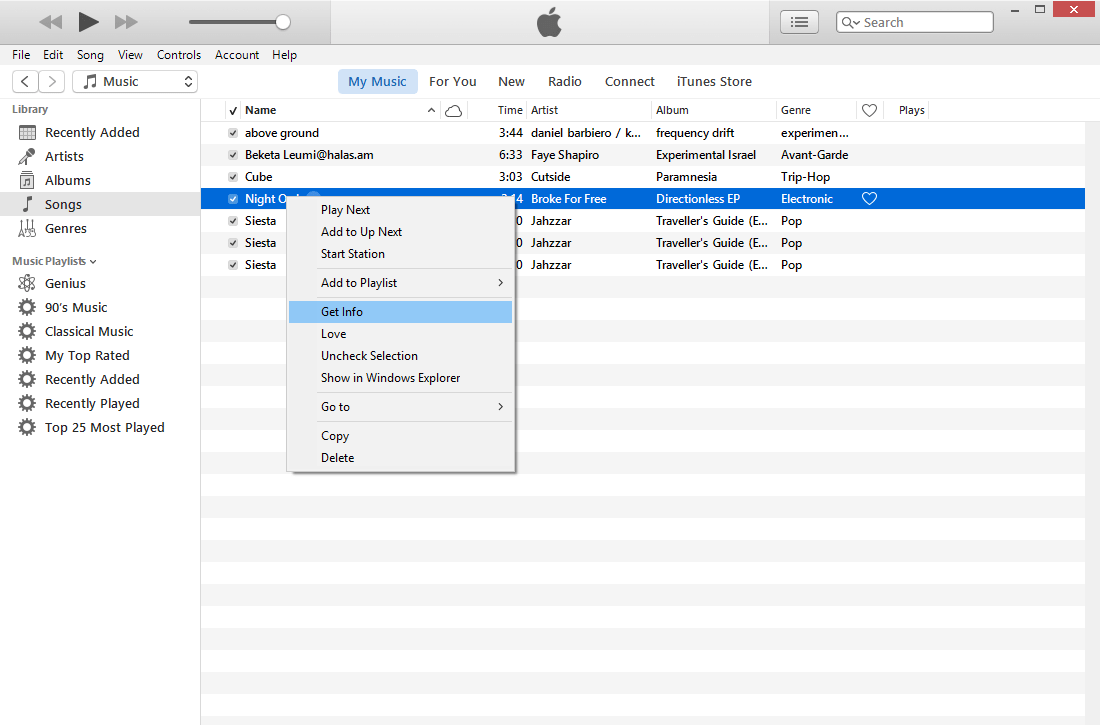
The first thing you will need to do, before starting to classify your songs based on their BMP levels is to check if they actually have their BMP value present. To do that, right-click on the desired track and select the "Get Info" option.
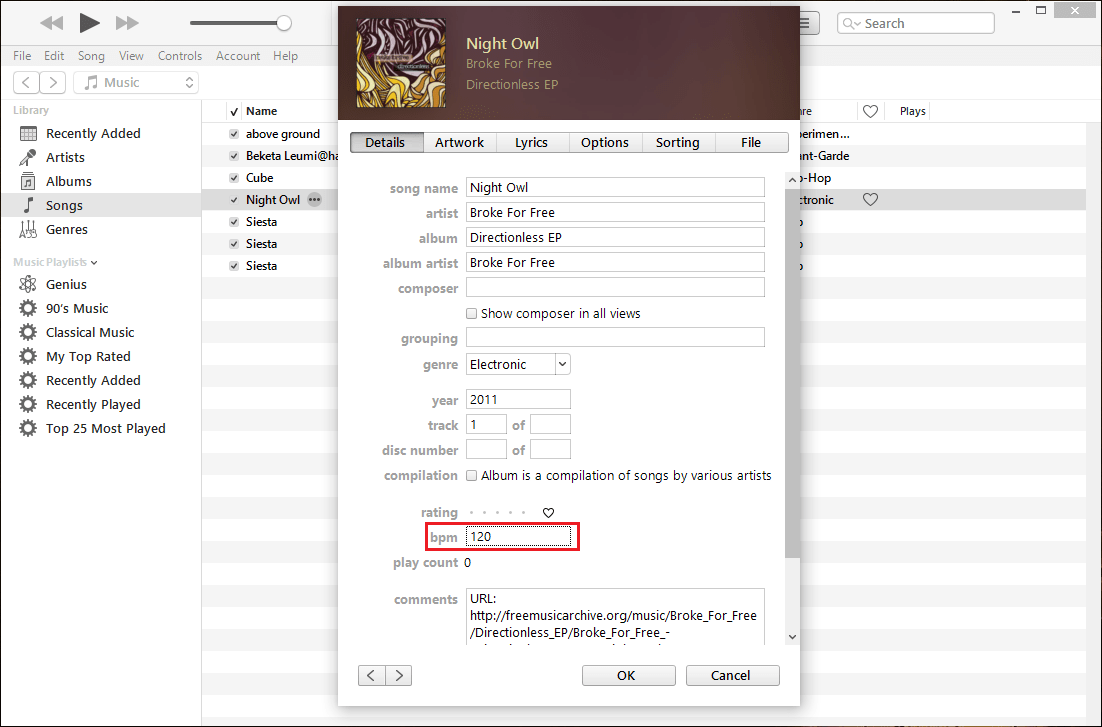
A new window will appear, from where you can view the BMP value of your selected song.
You might notice that some of your songs come without this information. You can either manually input the BMP values (not recommended, though) or use tools like beaTunes (for Windows and Mac OS X), Tangerine! (for Mac OS X) or BPMer (for Mac OS X) to automatically determine your song's BPM.
Create smart lists based on BPM
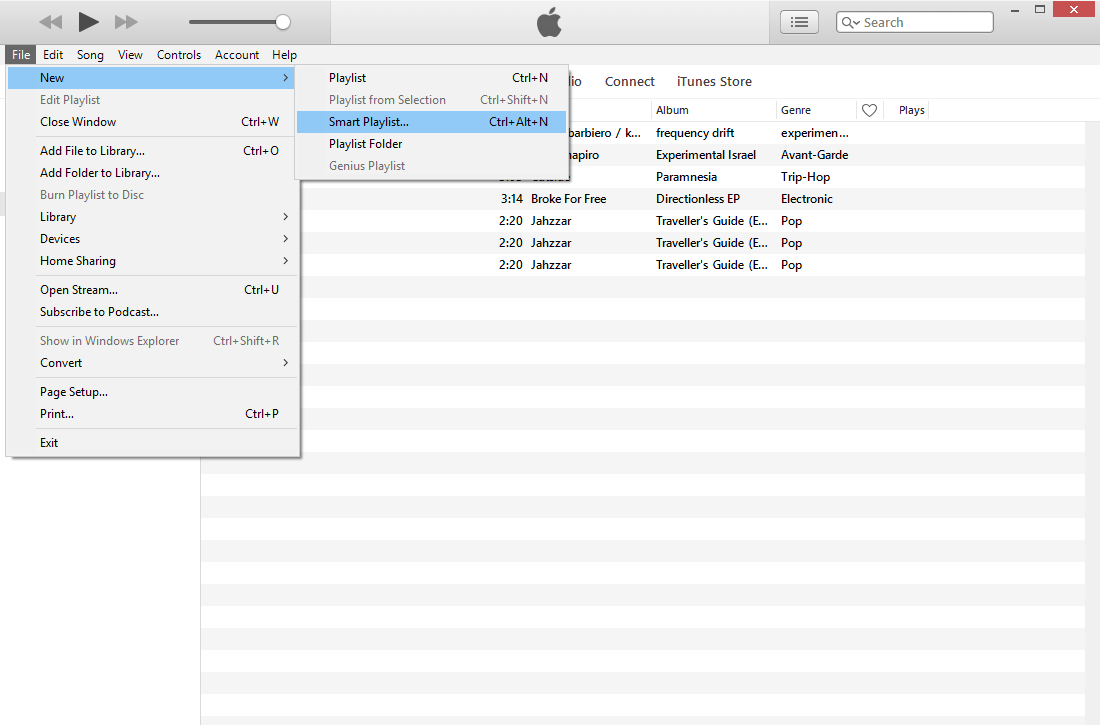
Now, when your songs have their BPM levels present, it is time to create a smart playlist that organizes them according to these values. You can start by going to the "File" menu, selecting the "New" option and clicking on the "Smart Playlist" item.
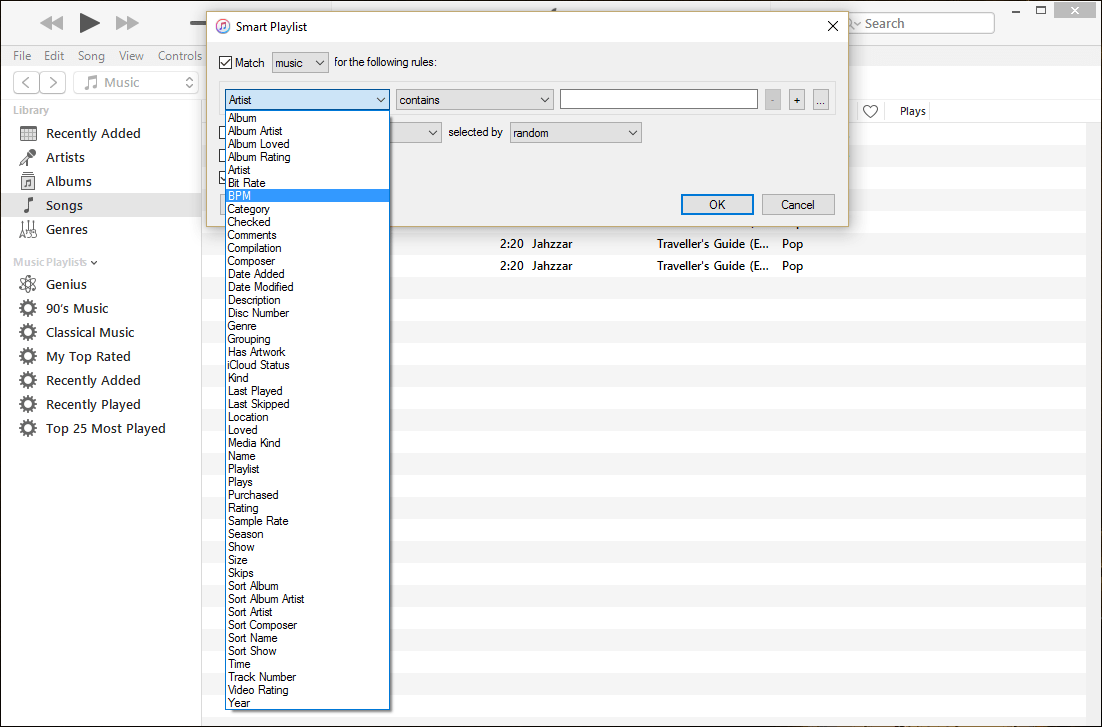
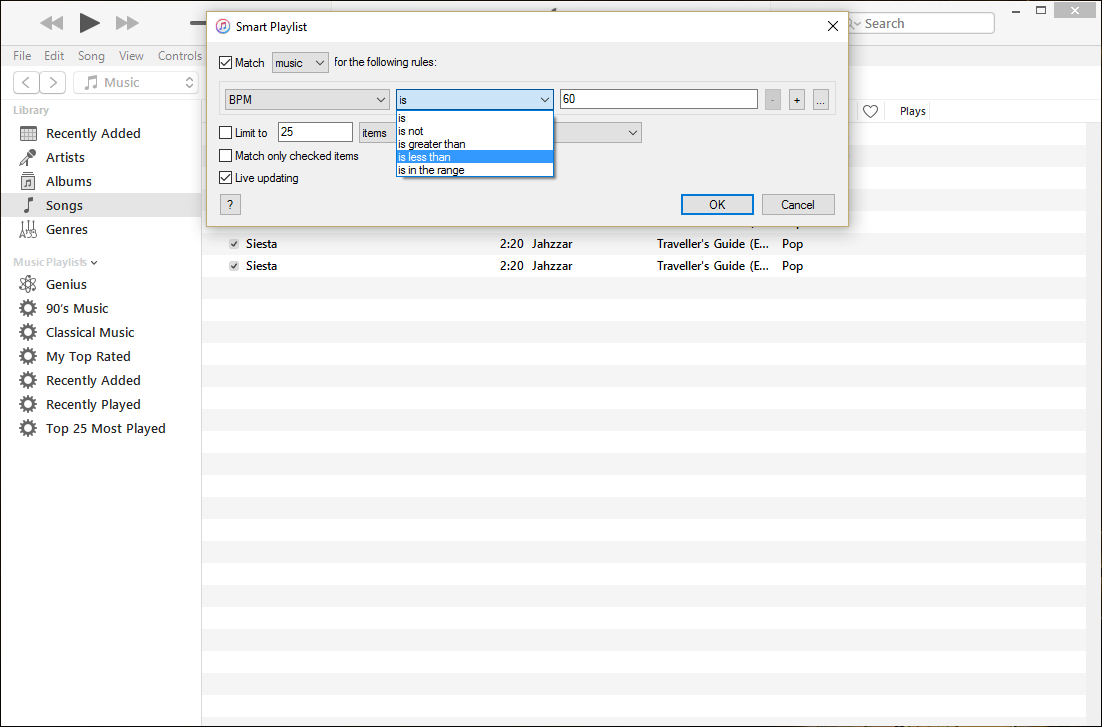
The next thing you will have to do is to click on the drop-down menu from the newly opened window and select BMP as the reference value.
Once you have done that, you will have to determine what type of classification you want. You can create playlists for songs that have the BPM value equal, lesser or greater than a provided number or within a desired range. You can also add multiple conditions (like a playlist with BMP greater than 80 and belonging to a certain genre) by clicking on the "+" button.
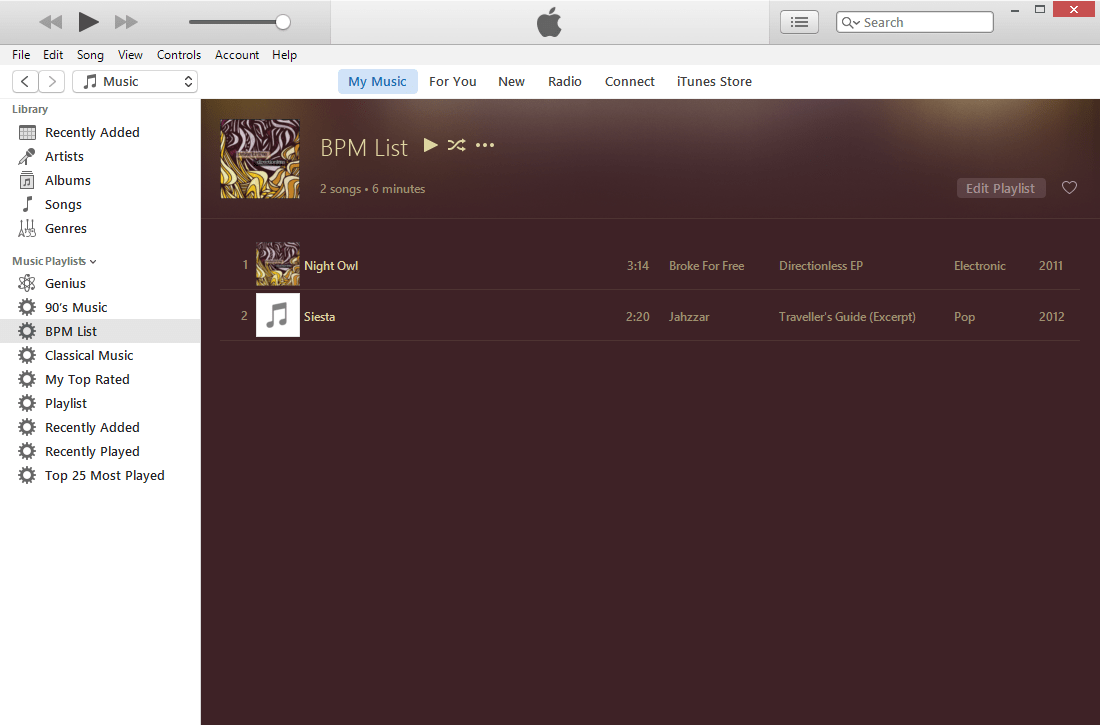
After providing all the desired parameters, simply click "OK" and wait for the songs playlists that fit the provided characteristics to be generated. In the image below, I have created a list of songs that have their BPM values between 90 and 140.
Organize entire music library by BPM values
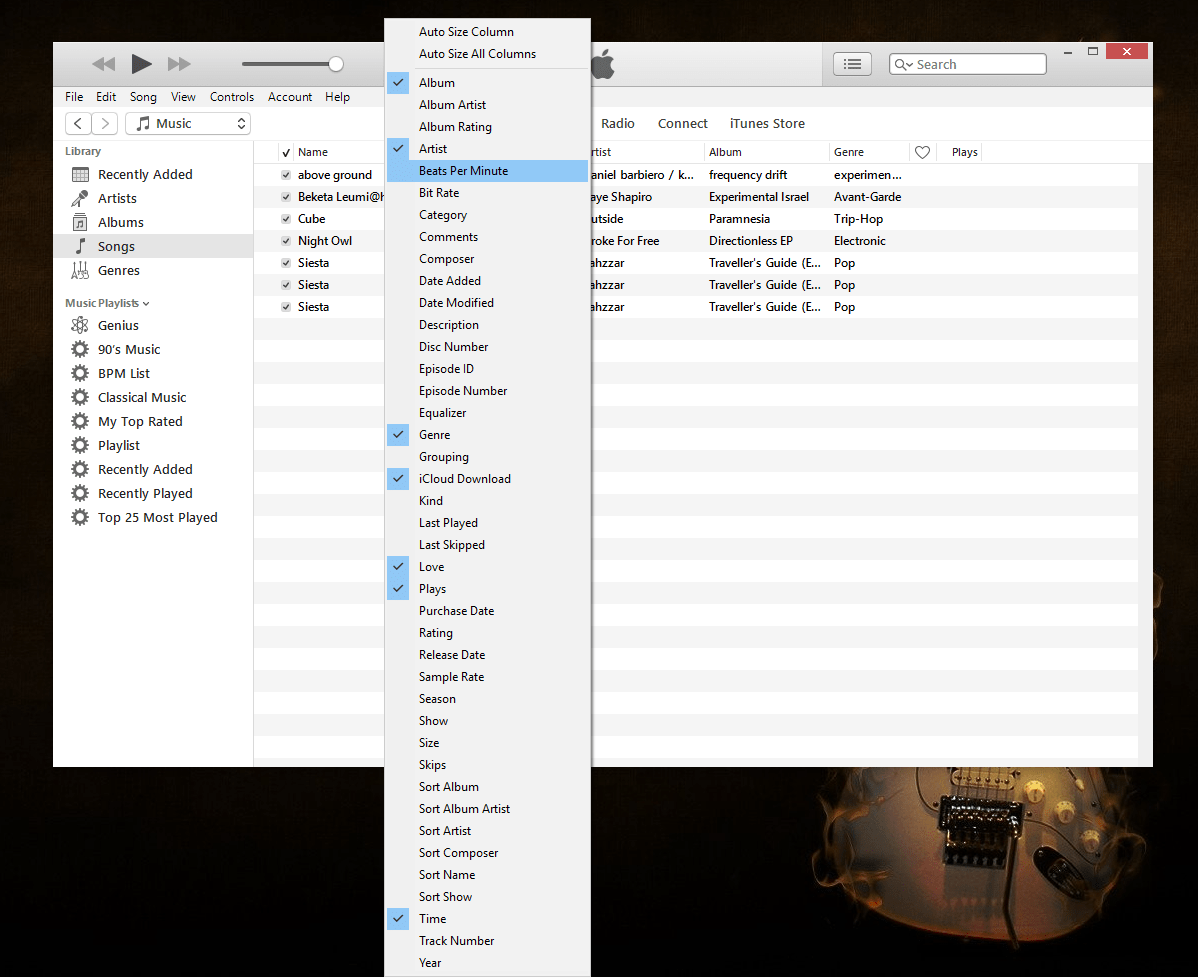
If you don't want to create separated smart playlists of songs that contain specific BPM values and just want to view all the music files from your iTunes library sorted by their beats per minute in an ascending or descending order, then you can easily do that by opening your songs library, right-clicking on the category bar (the one with the "Name", "Artist", "Album", "Genre" and other sorting items) and select "Beats Per Minute".
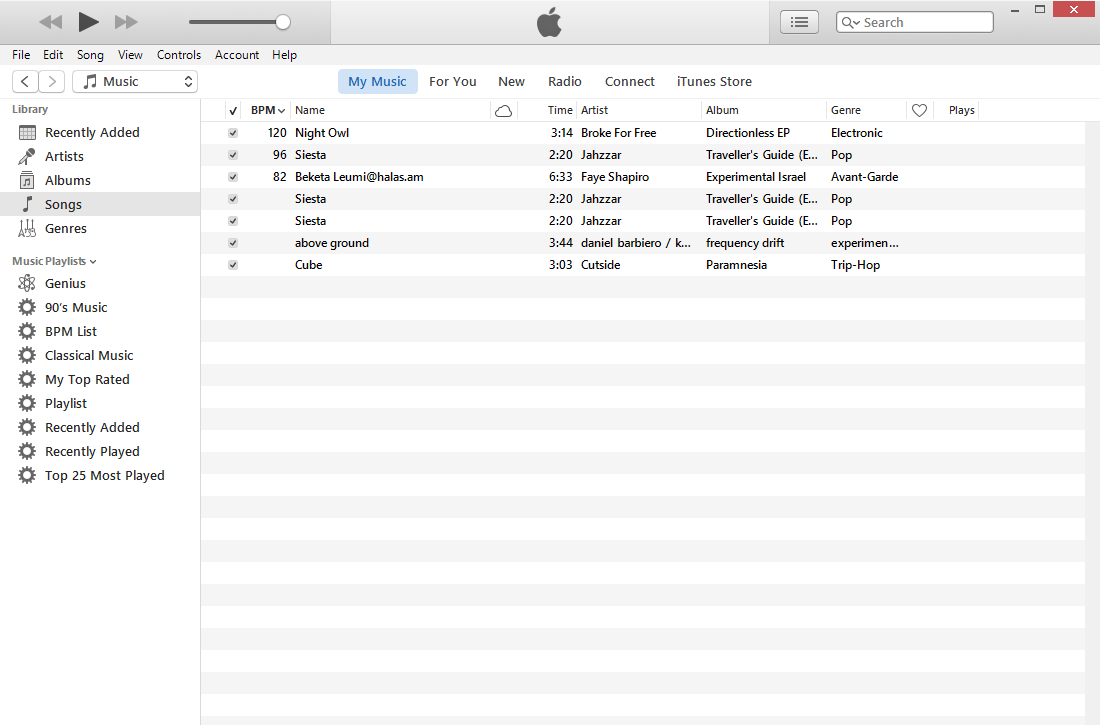
This will add the BPM value on the category bar, and you can easily sort your songs by clicking on it. Now you will have all of your music organized based on their BPM values.
Conclusion
As you can see, organizing your iTunes music based on their BPM values is quite a simple task, and the only thing that might pose a problem is providing the correct BPM information for your songs if it is not already present. Just remember that you can manually add these values or use third-party applications that will do that for you.
If you have any questions regarding this topic, feel free to leave me a message in the comment section below.


Comments
Subscribe to comments